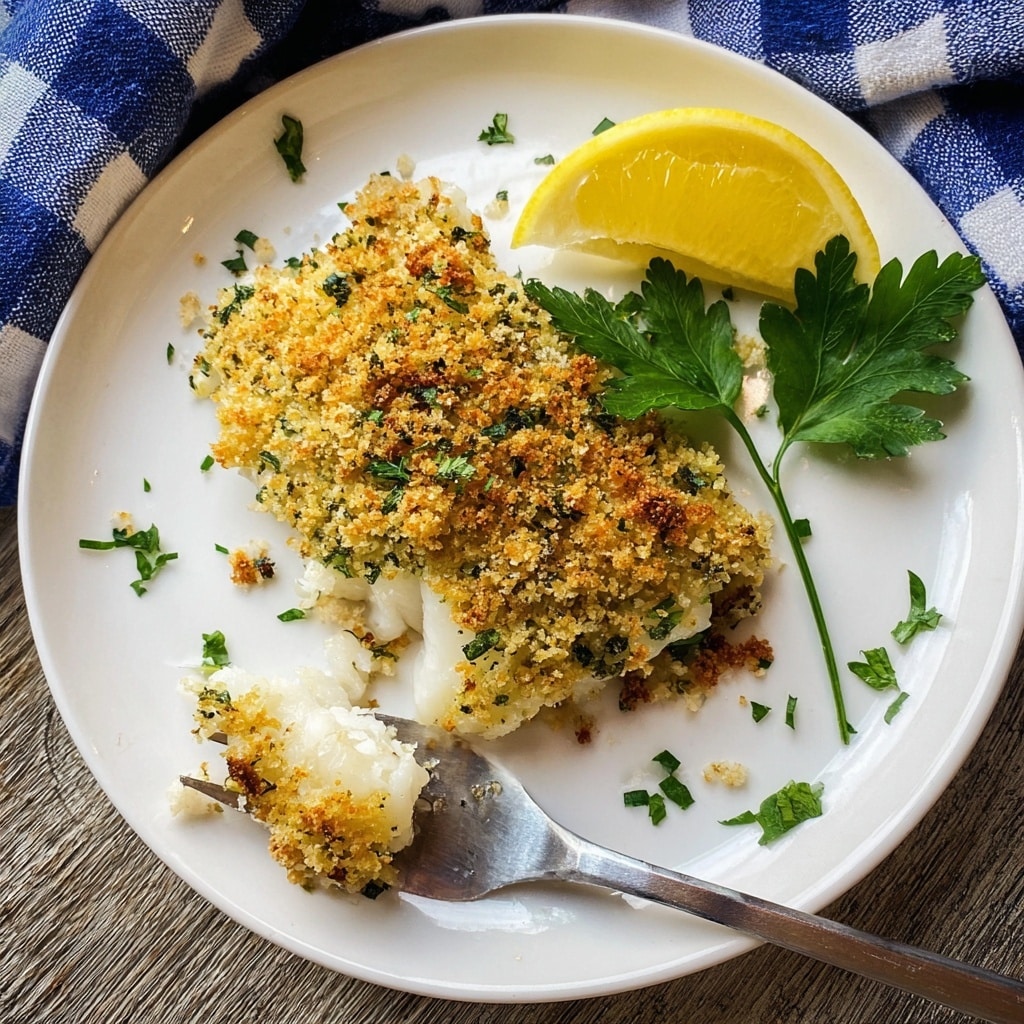
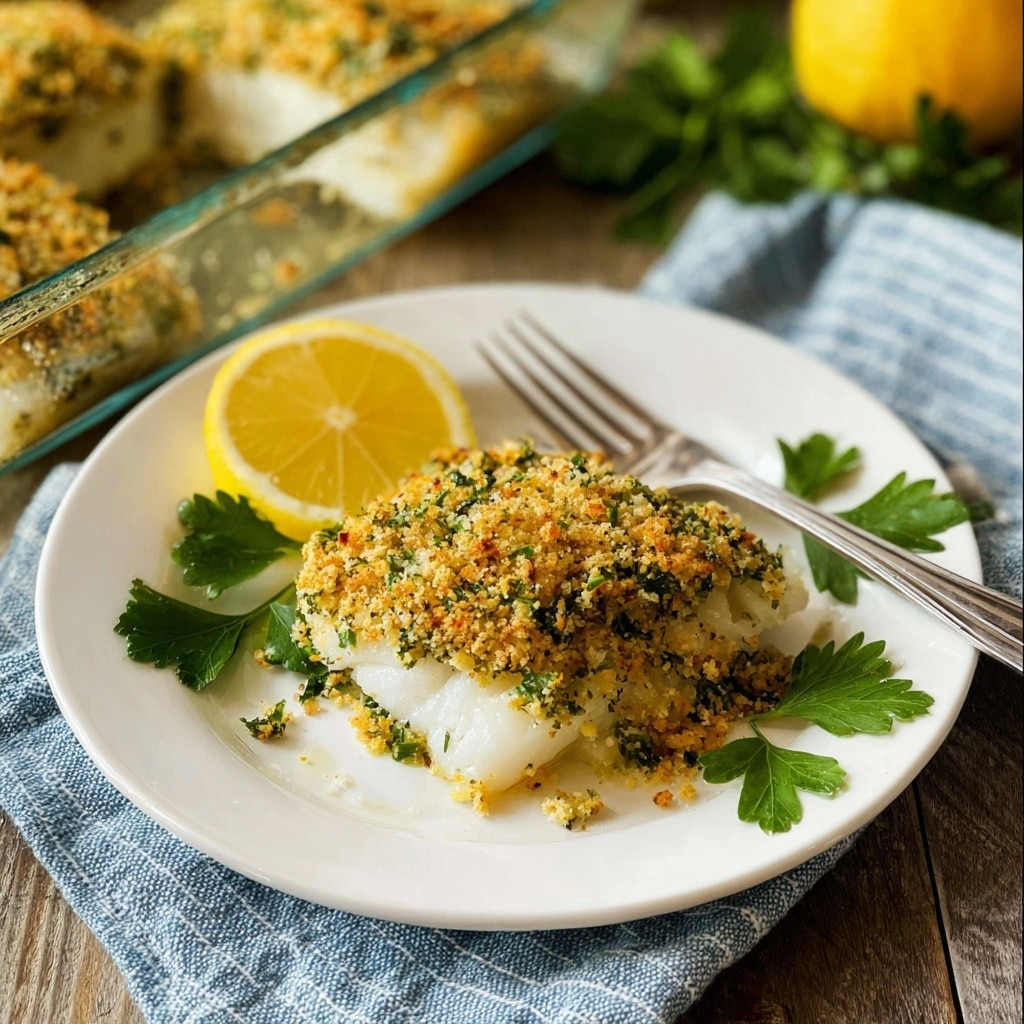
Baked Cod with Crispy Garlic Herb Panko Recipe
The moment you try this Baked Cod with Crispy Garlic Herb Panko, you’ll understand why it has become one of my go-to recipes whenever I want something both elegant and effortlessly delicious. The delicate, flaky cod fillets get topped with a golden, crunchy panko crust infused with garlic and fresh herbs, creating a perfect harmony of textures and vibrant flavor. This dish hits that sweet spot between simple and special, making it ideal for a busy weeknight or a cozy dinner with friends. Trust me, this is one recipe you’ll want to keep on hand for when you’re craving comfort with a bit of crunch.
Ingredients You’ll Need
Gather a handful of simple yet essential ingredients that come together to build layers of flavor and texture in this dish. Each one plays a crucial role in balancing buttery richness, fresh herbs, and that irresistible crispy topping.
- Salted butter: Using salted butter adds depth and a bit of richness that complements both the fish and the crispy topping.
- Cod fillets: Tender, mild white fish that cooks beautifully and pairs perfectly with the crunchy panko.
- Lemon wedges: Fresh lemon juice adds brightness and acidity to balance the richness.
- Kosher salt: Provides clean seasoning to elevate the natural flavors of the cod and crust.
- Black pepper: Adds subtle spice without overpowering the delicate fish.
- Garlic cloves: Fresh garlic infuses the melted butter, creating an aromatic base for the crunchy panko topping.
- Plain panko breadcrumbs: These light, airy crumbs create the signature crispiness of the crust.
- Fresh parsley: Chopped parsley adds a pop of herbal brightness and color to the topping.
How to Make Baked Cod with Crispy Garlic Herb Panko
Step 1: Preheat and Prepare
Start by setting your oven to 425 degrees Fahrenheit to ensure it’s hot enough to achieve a perfectly golden crust on the cod. Next, generously butter a 9 x 13 inch baking dish. This keeps the fish from sticking and adds buttery flavor right from the start.
Step 2: Season the Cod
Place the cod fillets in the buttered dish and season each piece with fresh lemon juice, kosher salt, and black pepper. This simple seasoning is crucial as it highlights the delicate flavor of the fish and creates a tasty base for the crust.
Step 3: Prepare the Garlic Herb Panko
In a small sauté pan over medium-low heat, melt the remaining butter. As soon as the butter begins to foam, turn off the heat and add minced garlic. Allow the garlic to infuse into the butter for about a minute, releasing its warm, fragrant aroma without browning.
Step 4: Toast the Panko
Stir in the panko breadcrumbs, tossing gently until the crumbs absorb all the garlicky butter. Then, mix in the chopped fresh parsley and season with salt and pepper. This mixture will become the crispy topping that adds irresistible texture and flavor to your cod.
Step 5: Top and Press
Evenly spread the garlic herb panko over each cod fillet and press down lightly to ensure it adheres firmly. This step helps the crust brown evenly and stay crispy after baking.
Step 6: Bake to Perfection
Bake the cod for 12 to 15 minutes until the panko topping turns a beautiful golden brown and the fish flakes easily with a fork. For best results, use a digital thermometer to check that the internal temperature reaches 145 degrees Fahrenheit — this guarantees a juicy and perfectly cooked filet.
Step 7: Serve Fresh
Remove from the oven and serve immediately with lemon wedges on the side for squeezing over the top. The fresh lemon adds a zesty brightness that lifts the whole dish beautifully.
How to Serve Baked Cod with Crispy Garlic Herb Panko
Garnishes
Simple garnishes complement this dish wonderfully. Try additional chopped parsley for a fresh green touch or scatter a few thin lemon slices on top for a fragrant citrus note that guests can enjoy visually and flavor-wise.
Side Dishes
This Baked Cod with Crispy Garlic Herb Panko pairs beautifully with light and vibrant sides. Steamed asparagus, garlic roasted potatoes, or a crisp garden salad provide balance and keep the meal feeling bright and satisfying without overwhelming the delicate flavor of the fish.
Creative Ways to Present
For a bit of flair, plate each fillet on a bed of wilted spinach or drizzle a lemon butter sauce around the edges. You can also serve the cod atop creamy risotto or buttered couscous to turn this simple dinner into something a little more special.
Make Ahead and Storage
Storing Leftovers
If you happen to have leftovers, store the cooked cod in an airtight container in the refrigerator for up to two days. Keep in mind that the panko crust might soften over time but flavors will still be delicious.
Freezing
I recommend freezing only the raw, seasoned cod fillets without the panko topping if you want to prep ahead. Wrap tightly in plastic wrap and then foil before freezing for up to 1 month. Add the panko topping fresh before baking after thawing.
Reheating
To reheat leftovers, gently warm the cod in a 350-degree oven for 8 to 10 minutes to preserve some of the crispy texture. Avoid the microwave if possible, since it can make the fish rubbery and the panko soggy.
FAQs
Can I use other types of fish for this recipe?
Absolutely! While cod is perfect due to its mild flavor and flaky texture, you can swap in haddock, halibut, or even pollock. Just adjust baking time depending on the thickness of the fillets to avoid overcooking.
How do I make the panko crust extra crispy?
Using plain panko and toasting it lightly in butter before baking helps achieve that fantastic crunch. Pressing the panko firmly onto the fish also ensures it stays intact during cooking.
Is it necessary to use fresh parsley?
Fresh parsley brightens the flavor and adds lovely color, but if you don’t have fresh, a teaspoon of dried parsley could work in a pinch. Just add less, as dried herbs tend to be more concentrated.
Can I prepare this recipe gluten-free?
You can easily make this dish gluten-free by swapping regular panko for gluten-free breadcrumbs. The baking and flavors remain just as wonderful, so no need to miss out on that crispy topping!
What can I do if I don’t have fresh garlic?
Fresh garlic really makes a difference here but if you’re out, a small amount of garlic powder can be used instead—mix it into the melted butter before adding the panko for that gentle garlicky flavor.
Final Thoughts
You really can’t go wrong with this Baked Cod with Crispy Garlic Herb Panko. It’s one of those dishes that feels indulgent and fresh at the same time, perfect for sharing or treating yourself. Once you try it, you’ll understand how something so simple can be packed with so much flavor and texture. Grab those ingredients, warm up your oven, and enjoy every crispy, buttery bite!
PrintBaked Cod with Crispy Garlic Herb Panko Recipe

This Baked Cod with Crispy Garlic Herb Panko is a flavorful and easy-to-make seafood dish featuring tender cod fillets topped with a crunchy garlic and herb panko crust. Perfect for a healthy weeknight dinner, it combines juicy fish with a buttery, garlicky coating that bakes to golden perfection.
- Prep Time: 10 minutes
- Cook Time: 15 minutes
- Total Time: 25 minutes
- Yield: 4 servings 1x
- Category: Main Course
- Method: Baking
- Cuisine: American
- Diet: Low Fat
Ingredients
Fish and Seasoning
- 4 (6-ounce) cod fillets
- 1 lemon, cut into wedges
- Kosher salt, to taste
- Pepper, to taste
Butter and Panko Topping
- 5 tablespoons salted butter, divided
- 3 garlic cloves, minced
- ½ cup plain panko breadcrumbs
- 3 tablespoons chopped fresh parsley
Instructions
- Preheat the oven: Preheat your oven to 425 degrees Fahrenheit (220 degrees Celsius) to ensure it’s hot enough to crisp the panko topping and cook the cod through evenly.
- Prepare the baking pan and season the fish: Coat a 9 x 13 inch baking dish with 1 tablespoon of the salted butter. Place the cod fillets in the pan, then season each fillet with fresh lemon juice, kosher salt, and freshly ground pepper to taste.
- Infuse butter with garlic: In a small sauté pan over medium-low heat, melt the remaining 4 tablespoons of butter. Once melted and beginning to foam, remove from heat and stir in the minced garlic. Let the garlic infuse the butter for about one minute to impart its flavor without burning.
- Make the panko topping: Add the panko breadcrumbs to the garlic butter and lightly toss until all the butter is absorbed. Stir in the chopped fresh parsley and season the mixture with salt and pepper to taste.
- Apply the topping: Evenly distribute the garlic herb panko mixture over the tops of each cod fillet, pressing down lightly to adhere the crumbs to the fish.
- Bake the cod: Place the baking dish in the preheated oven and bake for 12 to 15 minutes or until the panko crumbs are golden brown and the fish is cooked through. Verify doneness by checking that the internal temperature of the cod reaches 145 degrees Fahrenheit using a digital thermometer.
- Serve: Remove the cod from the oven and serve immediately with fresh lemon wedges for squeezing over the top, adding a bright and zesty finish to the dish.
Notes
- Use fresh cod fillets for the best texture and flavor.
- You can substitute parsley with fresh dill or basil for a different herb profile.
- Ensure not to overcook the fish; it should be moist and flaky.
- For a gluten-free version, use gluten-free panko or crushed gluten-free breadcrumbs.
- Leftovers can be refrigerated for up to 2 days and reheated gently to retain crispiness.
Nutrition
- Serving Size: 1 cod fillet with topping
- Calories: 320 kcal
- Sugar: 0.5 g
- Sodium: 390 mg
- Fat: 18 g
- Saturated Fat: 9 g
- Unsaturated Fat: 7 g
- Trans Fat: 0 g
- Carbohydrates: 12 g
- Fiber: 1 g
- Protein: 30 g
- Cholesterol: 75 mg
Keywords: baked cod, crispy panko crust, garlic herb cod, seafood dinner, healthy fish recipe