Peanut Butter and Jelly Pound Cake Recipe
Introduction
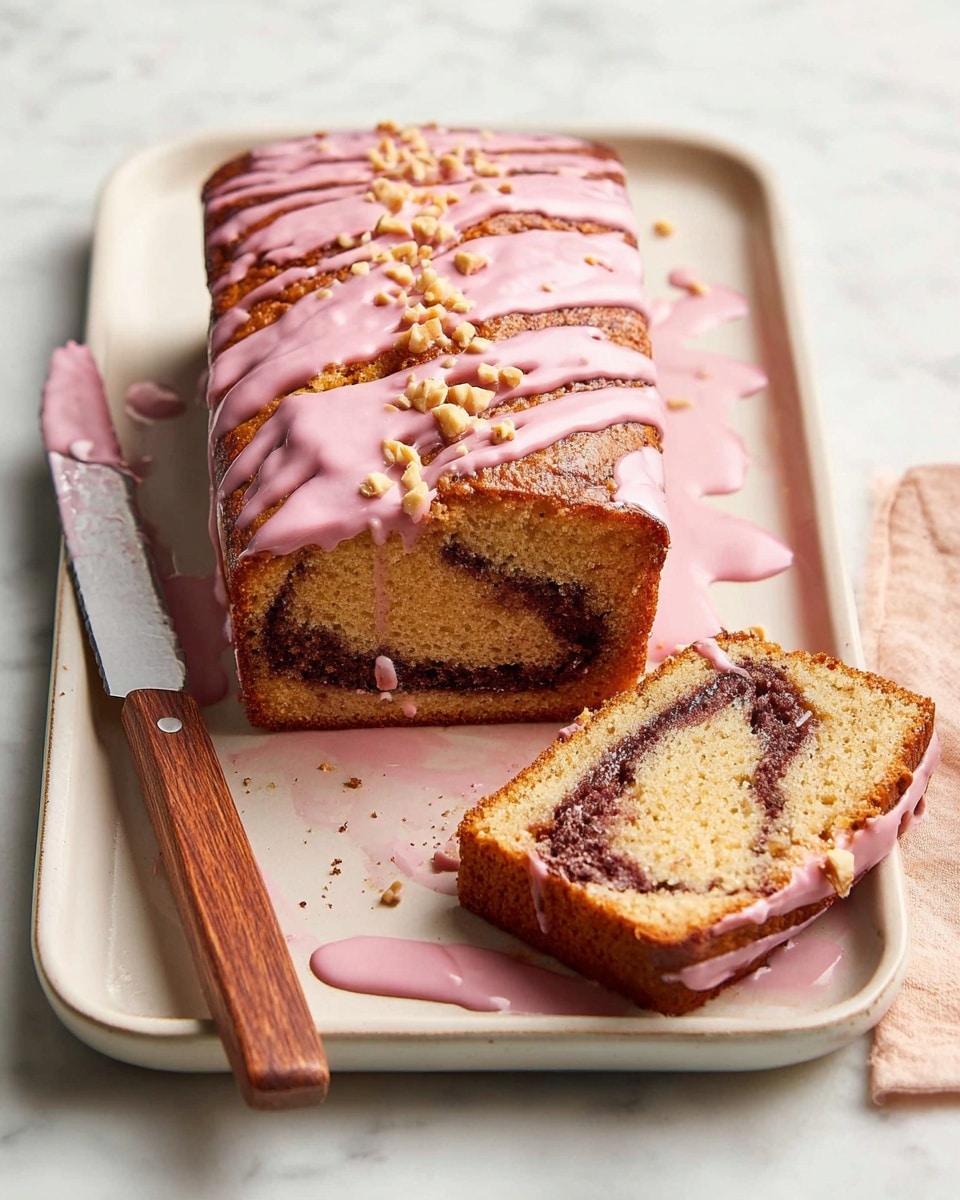
This Peanut Butter and Jelly Pound Cake is a nostalgic twist on a classic combination, delivering rich peanut butter flavor paired with sweet, fruity jam. The cake is moist and dense, layered with swirls of jam and finished with a smooth glaze and chopped peanuts for a delightful crunch.
Ingredients
- Butter, for greasing the pan
- 1 1/2 cups (190 grams) all-purpose flour
- 1 1/2 teaspoons kosher salt (such as Diamond Crystal) or ¾ teaspoon fine salt
- 1/2 teaspoon baking powder
- 1/4 teaspoon baking soda
- 1/2 cup (113 grams) unsalted butter, softened
- 3/4 cup (190 grams) smooth peanut butter
- 3/4 cup (150 grams) granulated sugar
- 2 large eggs, at room temperature
- 1/2 cup (134 grams) sour cream
- 1 tablespoon vanilla extract
- 1/4 cup whole milk
- 3/4 cup (188 grams) raspberry or strawberry jam
- 1/4 cup (63 grams) raspberry or strawberry jam
- 1 cup (100 grams) powdered sugar, sifted
- 1/4 teaspoon kosher salt (such as Diamond Crystal)
- 1/4 cup (57 grams) roasted salted peanuts, chopped
Instructions
- Step 1: Preheat the oven to 325°F (163°C). Butter an 8½-by-4½-inch loaf pan, line it with parchment paper leaving an overhang on the long sides, then butter the parchment as well.
- Step 2: In a medium bowl, whisk together the flour, salt, baking powder, and baking soda.
- Step 3: In a large bowl or stand mixer fitted with the paddle attachment, beat the softened butter and peanut butter on medium speed until very smooth, about 1 minute. Add the granulated sugar and beat until lighter in color, about 2 minutes.
- Step 4: Add the eggs one at a time, beating for 30 seconds after each addition until the mixture is very fluffy. Scrape down the sides of the bowl, then add the sour cream and vanilla and beat for about 1 minute until the mixture is mousse-like.
- Step 5: Add the dry ingredients all at once and beat on low speed until mostly incorporated. Scrape down the bowl, then add the milk and mix until just combined, careful not to overmix.
- Step 6: Spoon a heaping third of the batter into the prepared pan, spreading it to cover the bottom. Dollop half the jam in small spoonfuls over the batter. Add half the remaining batter on top, then dollop the remaining jam. Using a butter knife or skewer, swirl the jam gently to integrate.
- Step 7: Spread the remaining batter over the top, smoothing it into an even layer. Bake for 1 hour to 1 hour 15 minutes, until the cake pulls away from the sides and a tester inserted comes out clean. Let cool in the pan for 10 minutes.
- Step 8: Remove the cake from the pan using the parchment overhang and transfer to a wire rack to cool completely.
- Step 9: To make the glaze, warm the remaining jam in the microwave or over low heat until liquid. Strain to remove seeds if desired. In a bowl, whisk the jam with powdered sugar and salt until smooth and pourable but thick. Add 1 teaspoon water if needed to thin.
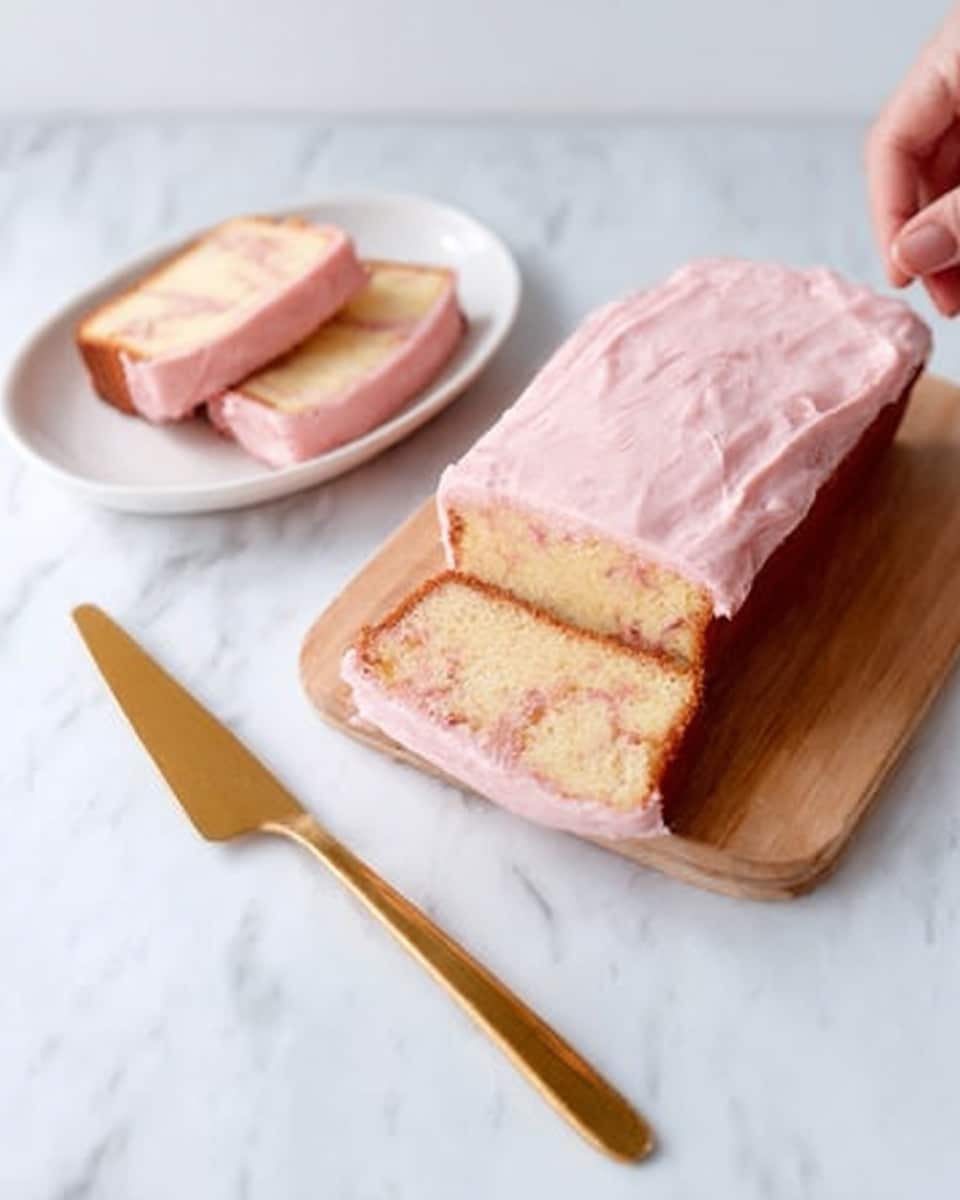
- Step 10: Drizzle glaze over the cooled cake and sprinkle with chopped peanuts. Slice and serve.
Tips & Variations
- Use smooth peanut butter for the best texture and creaminess in the cake batter.
- Try different jam flavors like apricot or blueberry for a unique twist.
- For a richer cake, replace the whole milk with buttermilk.
- If you prefer more peanut crunch, toast the chopped peanuts lightly before topping.
Storage
Wrap the cake tightly in plastic wrap or store in an airtight container at room temperature. It will keep well for 3 to 4 days. To reheat, warm individual slices gently in the microwave for 10-15 seconds, if desired.
How to Serve
Serve this delicious recipe with your favorite sides.
FAQs
Can I use natural peanut butter instead of smooth?
Natural peanut butter can be used, but it may affect the cake’s texture, making it less smooth and possibly drier. For best results, stick to smooth peanut butter.
Can I freeze this pound cake?
Yes, you can freeze the baked pound cake (without glaze) tightly wrapped in plastic wrap and foil for up to 2 months. Thaw overnight in the refrigerator before glazing and serving.
PrintPeanut Butter and Jelly Pound Cake Recipe
A rich and moist Peanut Butter and Jelly Pound Cake that combines creamy peanut butter batter with swirls of sweet raspberry or strawberry jam. Topped with a smooth, sweet glaze and crunchy roasted peanuts, this loaf cake offers a nostalgic twist on the classic PB&J sandwich, perfect for dessert or an indulgent snack.
- Prep Time: 20 minutes
- Cook Time: 1 hour 15 minutes
- Total Time: 1 hour 35 minutes
- Yield: 8 to 10 servings 1x
- Category: Dessert
- Method: Baking
- Cuisine: American
Ingredients
Pan Preparation
- Butter, for greasing the pan
- Parchment paper, for lining the pan
Dry Ingredients
- 1 1/2 cups (190 grams) all-purpose flour
- 1 1/2 teaspoons kosher salt (such as Diamond Crystal) or 3/4 teaspoon fine salt
- 1/2 teaspoon baking powder
- 1/4 teaspoon baking soda
Wet Ingredients
- 1/2 cup (113 grams) unsalted butter, softened
- 3/4 cup (190 grams) smooth peanut butter
- 3/4 cup (150 grams) granulated sugar
- 2 large eggs, at room temperature
- 1/2 cup (134 grams) sour cream
- 1 tablespoon vanilla extract
- 1/4 cup whole milk
Jam and Toppings
- 3/4 cup (188 grams) raspberry or strawberry jam
- 1/4 cup (63 grams) raspberry or strawberry jam
- 1 cup (100 grams) powdered sugar, sifted
- 1/4 teaspoon kosher salt (such as Diamond Crystal)
- 1/4 cup (57 grams) roasted salted peanuts, chopped
Instructions
- Prepare the pan: Preheat the oven to 325 degrees Fahrenheit. Butter an 8 ½-inch-by-4 ½-inch loaf pan, then line it with parchment paper allowing overhang on the long sides. Butter the parchment paper to prevent sticking.
- Mix dry ingredients: In a medium bowl, whisk together the all-purpose flour, kosher salt, baking powder, and baking soda until well combined.
- Beat butter and peanut butter: In a large bowl or stand mixer fitted with a paddle attachment, beat the softened unsalted butter and smooth peanut butter on medium speed until very smooth, about 1 minute.
- Add sugar and eggs: Add granulated sugar and beat until the mixture lightens noticeably in color, about 2 minutes. Add eggs one at a time, beating for 30 seconds after each until the batter becomes very fluffy. Scrape down the bowl sides.
- Add sour cream and vanilla: Mix in sour cream and vanilla extract, continuing to beat until the batter has a mousse-like texture, about 1 minute.
- Incorporate dry ingredients: Add all the dry ingredients at once and beat on low speed until mostly combined, taking care not to overmix. Scrape the bowl and then add the whole milk, mixing until just incorporated.
- Layer the batter and jam: Spoon about one-third of the batter into the prepared pan to cover the bottom evenly. Spoon half of the combined jam over the batter in small dollops, no need to spread. Add half of the remaining batter, then the remaining jam, and finally the remaining batter. Use a butter knife or skewer to swirl the jam through the batter gently. Smooth the top layer evenly.
- Bake the cake: Bake in the preheated oven for 1 hour to 1 hour and 15 minutes, or until the cake pulls away from the sides and a toothpick inserted in the center comes out clean. Let cool in the pan for 10 minutes.
- Transfer to wire rack: Remove the cake from the pan using the parchment overhang and transfer to a wire rack. Cool completely before glazing.
- Make the glaze: Warm the jam in a microwave-safe bowl for about 20 seconds or gently heat in a saucepan over low heat until liquid. Strain to remove seeds and solids. Whisk in powdered sugar and kosher salt until smooth and pourable but thick. Add 1 teaspoon water if glaze is too thick.
- Glaze and garnish: Drizzle the glaze evenly over the cooled cake and sprinkle with chopped roasted salted peanuts.
- Serve and store: Slice the cake to serve. Wrap any leftovers tightly; the cake keeps well for 3 to 4 days at room temperature.
Notes
- Use smooth peanut butter for a creamy texture; natural peanut butter may cause batter to be less stable.
- Line the pan with parchment paper for easy removal and cleaner edges.
- Allow ingredients like eggs and butter to come to room temperature for optimal mixing and texture.
- Do not overmix after adding dry ingredients to avoid a dense cake.
- Swirling the jam creates a marbled effect and delicious pockets of jam throughout the cake.
- Glaze adds sweetness and moisture while the peanuts add crunch and texture contrast.
- The cake can be stored at room temperature wrapped tightly for up to 4 days or frozen for longer storage.
Keywords: peanut butter cake, jelly cake, pound cake, peanut butter dessert, baked peanut butter cake, PB&J cake